SiteMap Tiles for SharePoint Add-in Support
Instructions
Download and Install SiteMap Tiles Add-in
Step 1: Purchase and Download the Add-in: (Requires Tenant or Farm Admin rights)
-
Go to the Microsoft Office Store.
-
Sign in using your Microsoft Account.
-
Select “Add” from the catalog to add to your account.
To Add the Add-in
Step 2: Go to the top level of the Site Collection and add the Add-in from the Site Contents area, just as you would any other Add-in (Requires Site Collection Admin rights)
-
Navigate to Site Contents.
-
Select “Add an App”.
-
Navigate to the icon marked “SiteMap Tiles by SmartData” and click on it to add the Add-in to your Site.

Navigate to Site Contents.

Click on 'add an app' and select it from your Add-in library.
To Use the Add-in:
Navigate to the Site Collection page. SiteMap Tiles by SmartData uses Search to automatically generate the most recent version of the Site Collection.
Key Features:
-
Security trimmed: Display of site will be security trimmed and will only display sites where the current user has a minimum of ‘View’ permission.
-
Printable SiteMap: The SiteMap display may be printed by the current user by selecting the ‘Print’ icon shown on the page. The number of Tiles printed on each row will adjust according to the paper width used.
-
Touch-friendly Navigation: The SiteMap display provides ‘Touch-friendly’ Tile images as navigation by providing hyperlinks to the sites that are shown.
-
Site Usage Information: Hover over a Tile image to display the ‘Last Modified Date’ of that subsite. This feature is useful in identifying subsites within a site collection where content is no longer being edited, especially handy when planning an upgrade.
Optional: To Change the Tile Images
You will need to access the Tile Images library to make changes to tile images (Requires Site Collection Admin rights).
-
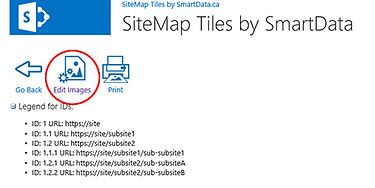
Select the link ‘Edit Images,' located at the top of the SiteMap Tiles Add-in page. This link takes you directly to the ‘SiteMap Tile Library’.
-
Upload new tile images to use, or replace current images in the library.
-
Once you have made all changes needed, the Add-in will automatically begin to use the new images in the library. Tile images are assigned to each subsite in the map based on 1) Site Level (top site level will be “Tile A”) and then 2) Alphabetically (i.e., Level 2, first tile working left to right will be “Tile B” then “Tile C”). Note: It is recommended that images be named in such a way that an Alphabetical sort will preserve the desired order of the Tiles as described.

Navigate to the icon marked “SiteMap Tiles by SmartData” and click on it to add the
Add-in to your Site.

Hover over a Tile image to display the site 'Last Modified Date' of that subsite.

This link takes you directly to the 'SiteMap Tiles Library'.

Upload new tile images to use, or replace current images in the library.
